- Enable POP in Gmail. Don't forget to click Save Changes when you're done.
- Open Windows Mail.
- Click the Tools menu, and select Accounts...
- Click Add...
- Select Email Account, and click Next.
- Enter your name as you would like it to appear in the 'From:' field of outgoing messages, and click Next.
- Enter your full Gmail email address (username@gmail.com).
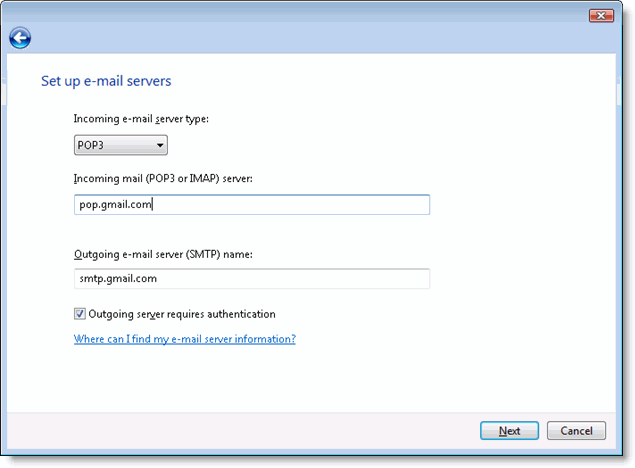
- Fill in all necessary fields to include the following information:
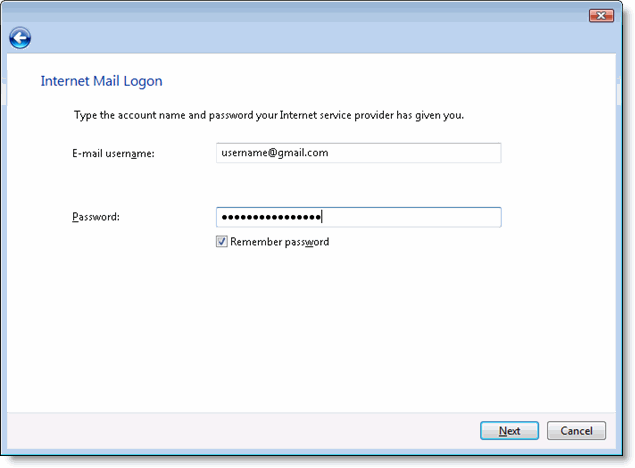
- Click Next, and enter your full Gmail address (including '@gmail.com') and your Gmail password.
- Click Next, and then check the box next to Do not download my e-mail at this time. Click Finish.
- On the Internet Accounts screen, make sure that your pop.gmail.com mail account is selected, and click the Properties button.
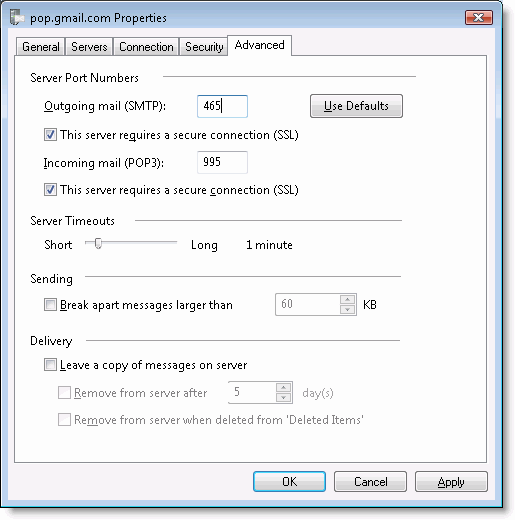
- On the Advanced tab, enter 465 in the in the box next to Outgoing mail (SMTP), and check the box next to This server requires an encrypted connection (SSL).
- Check the box next to This server requires an encrypted connection (SSL) under Incoming mail (POP3). The box next to Incoming mail (POP3) should automatically update to 995.
- Click OK. You're done! Close the Internet Accounts window and click Send/Receive to start checking your Gmail messages.
Incoming mail server type: POP3
Incoming mail (POP3 or IMAP) server: pop.gmail.com
Outgoing e-mail server (SMTP) name: smtp.gmail.com
Outgoing server requires authentication: enabled


